FireBase Authentication
What is FireBase Authentication?
Firebase Authentication help Users to login from your app, where Firebase will authenticate users by using their Phone number, Email, Google, Facebook, Twitter and generate unique id for Registered users. It saves lots of time for authenticating and managing every user.
Video Demo
1. Firebase setup in Android Studio
In the previous blog, we learned how to setup firebase in android studio if you want know more, please jump to Firebase Setup
- After creating Project in Firebase console, Getinto the project and select Authentication on the left side.
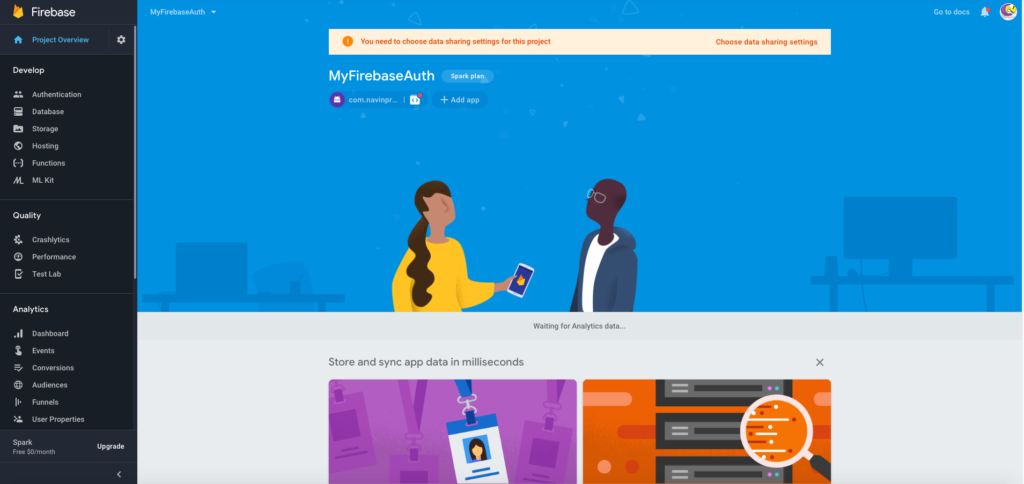
- Then click “setup new sign-in method” on the sign-in method Tab.
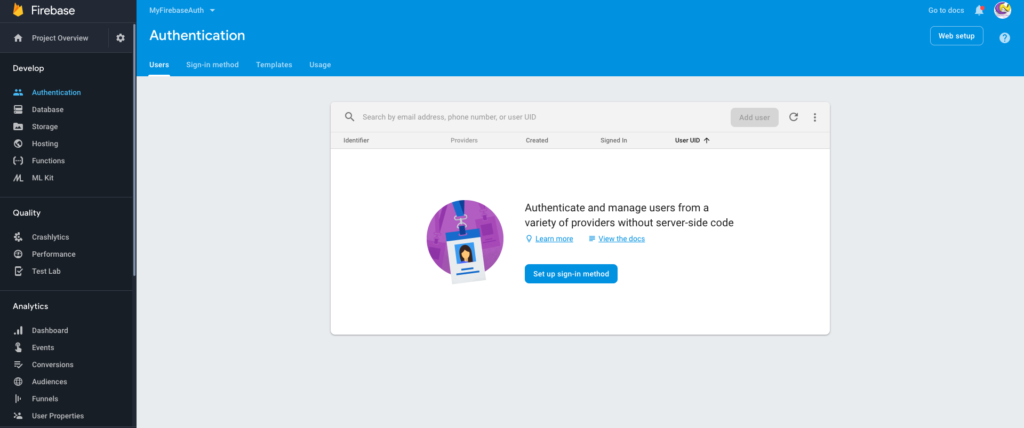
- Now Enable Email/Password option and save, now users can be authenticated by using their Email and
Password.
2. Registration page
- Create a project “MyFirebaseAuth” in android studio. Rename the MainActivity as “DashboardActivity”. This is the first activity called when app launches.
- Add Internet Permission in Manifest.xml
<uses-permissionandroid:name="android.permission.INTERNET"/> - Add below colors in color.xml
- Now create an another Activity as “RegistrationActivity”, in this activity new users will register their Email and Password.note:(password should contain minimum 6 characters).
- Add the below code in your “activity_registration.xml” file. This layout has EditText for getting Email and Password.Button for register.
activity_registration.xml
- Add the below code in your “Registration.java” file.
RegistrationActivity.java
- Firebase provides createUserWithEmailAndPassword() method for creating a new User.
- Email and password is passed to this method, firebase will automatically store the user details with unique User UID.
- If Authentication is success, then user is directed to the LoginActivity.
3. Login page
- Create an Activity “LoginActivity”, This activity will authenticate the User using their registered Email and Password.
- Add the below code in your “activity_login.xml” file. This layout has EditText for getting Email and Password. Button for Login and Register.
activity_login.xml
- Add the below code in your “Login.java” file.
LoginActivity.java
- Firebase provides signInWithEmailAndPassword() method for authenticatingregistered User.
- Email and password is passed to this method, firebase will automatically authenticate the user details, onComplete “task” isSuccess means login is completed. Then User is saved local app storage.
- If Login is success, then user is directed to the DashboardActivity.
4. Dashboard page
- Dashboard activity will display simple Text after successful completion of Login. Hope you already created this activity.
- This activity is called first on app launches, when activity is in onStart state mAuth.getcurrentUser() method is called, the recommended way to get the current user is by calling the getCurrentUser method. If no user is signed in, getCurrentUser returns null.
- If currentUser is Null, then it will direct to Loginpage, else Dashboard page is displayed.
- Logout :
For Logout process, Firebase reduces lot of time. you can just call it will signout the current user.
- Create a menu.xml file in layout – Menu folder for Logout option.
- Now add below code “DashboardActivity.java”
DashboardActivity.java
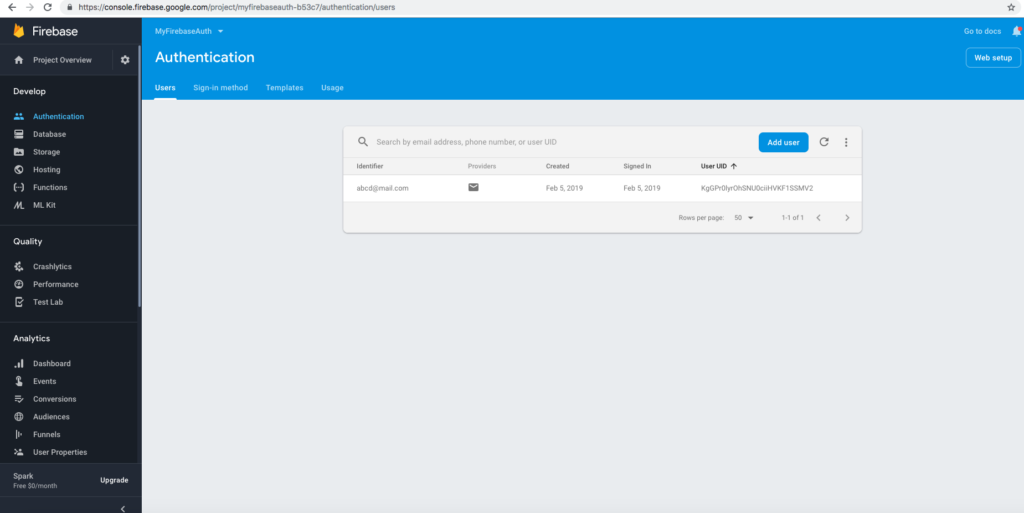
- After Registering the User details in Registration Activity, Check out in firebase console. The user has been registered successfully.
Hope this article is helpful, now you can authenticate your app users by using Firebase Authentication.
I am NavinKumar, Android and Flutter developer. You can find me on Linkedin or stalk me on GitHub or Follow me on Medium.
0 Comments


